
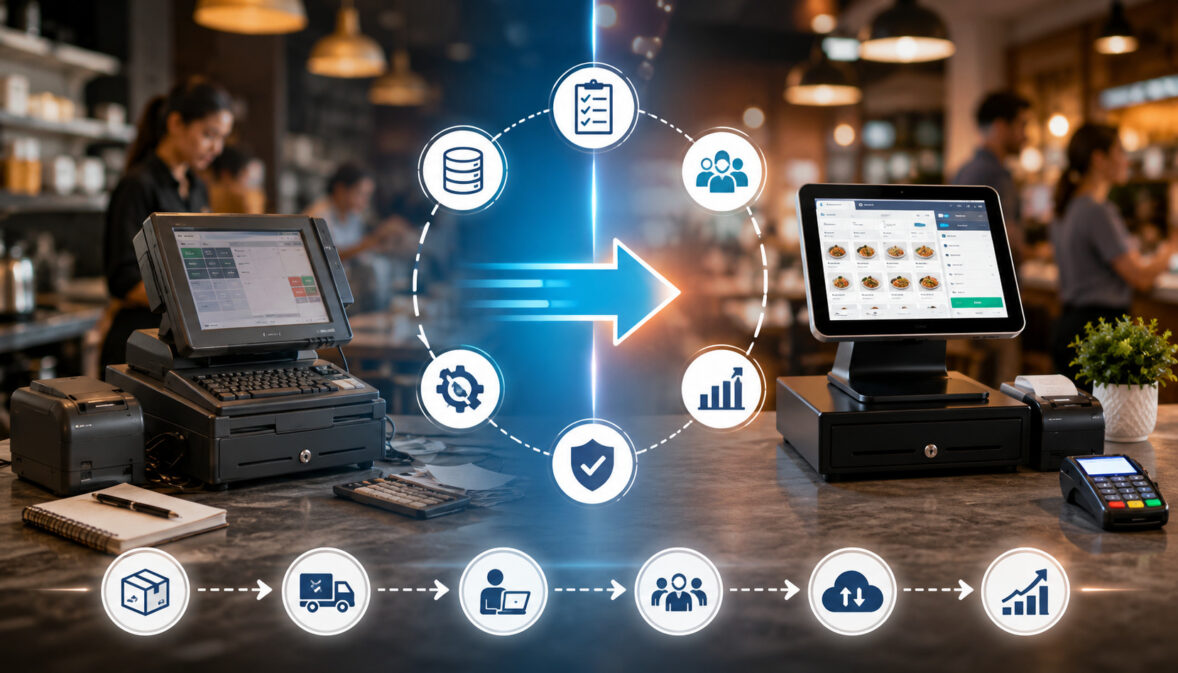
Switching POS systems without disrupting service requires more than installing new terminals and teaching employees where to tap the screen.
A restaurant’s point of sale system connects ordering, payments, tips, receipts, kitchen communication, menu availability, inventory, online orders, employee access, and management reporting. When any part of that network is configured incorrectly, the effects can reach customers within minutes.
A server may be unable to send an appetizer to the correct kitchen station. A cashier may discover that a discount button is missing during a long line. A bartender may be unable to reopen a tab, or a manager may find that online orders are not appearing in the kitchen display system.
These problems are avoidable when the restaurant treats the change as an operational project rather than a software installation.
A successful POS system migration begins with a written plan. Menu and customer data must be reviewed, hardware and payment terminals must be tested, employee permissions must be configured, and staff must practice realistic service scenarios.
Managers also need a backup plan in case the internet, payment connection, printer, or software becomes unavailable during the transition.
This guide explains the complete POS migration process for restaurants, cafés, bars, quick-service concepts, food trucks, and multi-location groups. It focuses on operational continuity, practical testing, staff preparation, and protecting the customer experience before, during, and after the go-live date.
The information is general educational guidance. Restaurants should obtain professional review for questions involving payment compliance, contracts, taxes, accounting, payroll, employment requirements, or other obligations that depend on their specific operations.
What Does Switching POS Systems Mean?
Switching POS systems means replacing one point of sale environment with another. The change may involve POS software migration, new payment terminals, updated printers, a different kitchen display system, revised menu screens, new employee logins, and changes to connected restaurant management software.
Understanding how cloud POS systems work in restaurants can help operators identify the software, hardware, data, and workflow components that may be affected during the transition.
In a simple operation, the project may involve one tablet, one card reader, and one receipt printer. In a full-service restaurant, the migration may affect several server stations, handheld devices, bar terminals, cash drawers, kitchen printers, online ordering channels, loyalty programs, gift cards, scheduling tools, inventory integration, and reporting dashboards.
The technical installation is only one part of the project. A POS transition also changes daily behavior.
Employees may need to learn a different order-entry sequence. Managers may need to use new procedures for voids, discounts, refunds, shift reviews, and batch settlement. Kitchen employees may receive tickets in a different format, while owners may need to interpret reports that organize sales, tips, taxes, and labor differently.
Restaurants considering a more connected environment should first understand how a point of sale system connects transactions, inventory, customer management, and other operational functions. This helps managers determine which features and integrations should be included in the initial migration.
Why Restaurants Switch POS Systems
Restaurants switch POS systems for many practical reasons. An older system may have become slow, unreliable, difficult to update, or incompatible with modern payment devices. It may not support online ordering, contactless payments, digital wallets, delivery integrations, or real-time reporting.
Operational limitations can also drive a POS system upgrade. Managers may struggle to track ingredient usage, compare location performance, manage menus across several stores, or control employee permissions. Servers may need too many screen taps to enter common orders, and kitchen teams may receive unclear tickets.
Common reasons for switching POS systems include:
- Frequent hardware failures or software freezes
- Slow order entry and checkout
- Limited menu and modifier controls
- Weak inventory or recipe tracking
- Inadequate multi-location reporting
- Poor online ordering integration
- Unreliable payment terminals
- Difficult employee training
- Limited customer, gift card, or loyalty tools
- Lack of useful scheduling or labor integrations
- Inconsistent support when problems occur
The goal should not simply be obtaining newer technology. A successful restaurant POS migration should solve identifiable service, reporting, payment, or management problems.
Why POS Migration Needs Careful Planning
A POS system supports nearly every customer transaction. A rushed POS migration process can therefore create service delays even when the new software is working as designed.
For example, a steak entrée may be configured correctly in the menu but routed to the wrong kitchen printer. A tax setting may be assigned incorrectly to takeout orders. A card terminal may accept payments but fail to transfer tips into the expected report. An online ordering menu may display an item that the kitchen cannot prepare.
Careful planning allows managers to identify these issues before customers encounter them.
A strong migration plan connects technical preparation with restaurant operations. It considers what happens from the moment a customer places an order until the payment is settled and the transaction appears in management reports.
POS System Migration at a Glance
The following table summarizes the major areas that restaurant owners and managers should review before switching POS systems.
| Migration Area | What to Review | Why It Matters | Best Practice |
| Menu data | Items, prices, modifiers, categories | Prevents order-entry and pricing errors | Clean and standardize data before transfer |
| Hardware | Terminals, printers, cash drawers, displays | Keeps service stations operating | Install and test devices before go-live |
| Payments | Cards, tips, refunds, batches | Prevents checkout disruption | Complete test transactions and settlement |
| Staff access | Roles, permissions, time clock | Protects sensitive functions | Create and test users before launch |
| Kitchen routing | Prep stations, printers, displays | Prevents delayed or missed orders | Send sample tickets to every station |
| Inventory | Ingredients, recipes, stock units | Supports accurate usage tracking | Confirm item and ingredient mapping |
| Online ordering | Menus, prices, availability, order flow | Prevents missed or incorrect orders | Complete a customer-style test checkout |
| Reports | Sales, labor, taxes, tips, discounts | Supports management review | Compare old and new reporting formats |
| Training | Front-of-house, kitchen, managers | Reduces confusion during service | Train employees by job role |
| Backup plan | Offline mode, manual tools, contacts | Reduces downtime risk | Document and rehearse downtime steps |
The table can serve as the foundation of a POS rollout checklist. However, managers should expand each area into detailed tasks that reflect the restaurant’s menu, service model, staffing structure, and technology environment.
How to Use the Table Before Migration
Begin by assigning an owner to each migration area. The person responsible does not need to perform every task, but that person should confirm that testing is complete and that unresolved problems are documented.
Next, rate each area according to its operational risk. Payments, kitchen routing, menu pricing, and order entry are usually high-risk because a failure can affect customers immediately. Historical reporting or advanced loyalty functions may be important but can often be stabilized after core service workflows are functioning.
Managers can then convert each row into test cases. For example, the payment row should include card insertion, tapping, swiping when supported, digital wallets, split payments, tips, refunds, voids, partial payments, and end-of-day settlement.
Do not mark a category complete only because a device turns on. Completion means the function has worked successfully in a realistic restaurant scenario.
Why Every Restaurant Migration Is Different
A small café may need a short POS transition plan involving a counter terminal, receipt printer, cash drawer, and basic menu. A food truck may prioritize mobile connectivity, compact hardware, battery power, and reliable offline procedures.
A full-service restaurant may need table management, coursing, seat numbers, split checks, bar tabs, reservation connections, and detailed kitchen routing. A bar may place greater importance on fast tab lookup, preauthorization behavior, tip handling, and bartender permissions.
Quick-service restaurants often require rapid button layouts, combo building, drive-through workflows, menu boards, and high-volume kitchen displays. Multi-location organizations may also need centralized menus, location-specific pricing, user management, consolidated reporting, and staged deployment.
These differences explain why a generic POS migration checklist should be customized before use. The right migration sequence depends on the restaurant’s actual service workflow.
Step One: Review Your Current POS Problems
Before selecting settings in a new restaurant POS system, identify what the current system is failing to do well. Otherwise, the restaurant may recreate old problems in a newer interface.
Start by documenting issues that directly affect service. These may include slow checkout, missing menu buttons, confusing modifiers, unreliable printers, difficult refunds, inaccurate kitchen routing, or delays caused by employees switching between disconnected tools.
Management problems should also be reviewed. Owners may lack clear sales reports, location comparisons, labor visibility, inventory information, or reliable online order reconciliation. Accounting staff may spend excessive time correcting exports, while managers may struggle to identify why a cash drawer or payment batch does not balance.
Group current problems into categories:
- Customer-facing service problems
- Front-of-house workflow problems
- Kitchen and production problems
- Payment and reconciliation problems
- Reporting and management problems
- Inventory and menu-control problems
- Employee access and training problems
- Integration and support problems
This review provides measurable goals for the new system. Instead of saying the restaurant needs a “better POS,” the team can state that it needs faster modifier entry, clearer kitchen routing, reliable online ordering, or consolidated multi-location reporting.
Separate Must-Have Fixes From Nice-to-Have Features
POS platforms often include long feature lists. Many capabilities may sound useful during a demonstration but may not address the restaurant’s most urgent operational problems.
Create two lists. The must-have list should include functions required for daily service, such as reliable payments, correct tax settings, kitchen routing, online order acceptance, table management, or location-level reporting.
The second list can include features that would be helpful but are not essential for launch. Examples may include advanced loyalty automation, complex inventory forecasting, customer marketing tools, or deeper scheduling functions.
Prioritizing requirements helps prevent scope expansion during restaurant POS implementation. It also makes testing more focused because the team knows which workflows must be fully stable before the go-live date.
Ask Staff What Slows Service Down
Owners and senior managers do not always see the small problems that occur during every shift. Servers, bartenders, hosts, cashiers, kitchen employees, shift leaders, and bookkeepers experience different parts of the POS workflow.
Ask employees to identify tasks that require unnecessary steps, create frequent mistakes, or depend on workarounds. A bartender may report that tabs are difficult to find. A kitchen manager may explain that modifier descriptions are unclear. A cashier may point out that popular items are buried in the wrong menu category.
Bookkeepers and managers can identify reporting and reconciliation problems. They may spend time combining reports, correcting tip totals, or tracking online orders that appear separately from in-store transactions.
Collecting this feedback before configuration helps the restaurant design screens, permissions, reports, and training around actual work rather than assumptions.
Step Two: Build a POS Transition Plan
A written POS transition plan turns a complicated technology change into a series of manageable operational tasks. It should show what must happen, who is responsible, when each task is due, and how completion will be verified.
The timeline should include:
- Current-system review
- Contract and data-access review
- Menu and customer data cleanup
- Data export and archive preparation
- New menu configuration
- Hardware delivery and installation
- Network review
- POS payment setup
- Employee account creation
- Integration configuration
- Staff training
- Pilot testing
- Parallel testing
- Backup-plan preparation
- Go-live support
- Post-launch review
Build extra time into the schedule. Menu imports may require corrections, hardware may arrive later than expected, or an integration may need additional credentials. A timeline with no buffer creates pressure to launch despite unresolved problems.
The plan should also define the point at which the restaurant will postpone the launch. For example, management may decide that the launch cannot proceed if payment settlement, kitchen routing, online ordering, or manager access has not passed testing.
Assign a Migration Lead
One person or a small project team should coordinate the migration. Without clear ownership, menu questions may go unanswered, testing may be duplicated, and employees may receive conflicting instructions.
The migration lead should maintain the master POS migration checklist, schedule training, record configuration decisions, coordinate data review, and track unresolved issues. This person should also know whom to contact for hardware, payment, software, network, and integration problems.
In larger operations, assign workstream owners for:
- Menu and pricing
- Payments and reconciliation
- Hardware and networking
- Front-of-house workflows
- Kitchen workflows
- Integrations
- Staff training
- Reporting and post-launch review
The migration lead does not need to be the most technical person. Organization, communication, and knowledge of restaurant operations are often more important.
Choose a Low-Risk Go-Live Window
The go-live date should avoid the busiest shifts, major events, holiday periods, seasonal peaks, and high-volume weekends. A quiet weekday or lower-volume service period gives staff time to ask questions and allows managers to correct small issues before traffic increases.
Review the restaurant’s historical sales patterns when selecting the launch window. Consider catering orders, local events, reservations, promotions, employee availability, and planned menu changes.
Avoid combining the POS system upgrade with several other major changes. Launching a new menu, new pricing, new delivery channel, and new POS on the same day makes troubleshooting much harder.
A soft launch may be useful when practical. The restaurant can use the new system during a limited shift or reduced-volume period before relying on it for peak service.
Step Three: Clean Up Menu and Item Data
Menu migration is one of the most important parts of POS data migration. An inaccurate menu can cause pricing errors, incorrect kitchen tickets, inconsistent reporting, and employee confusion.
Do not automatically copy every item from the old system. Review the data first and remove inactive products, temporary buttons, duplicate items, outdated prices, and unused modifiers.
Standardize naming conventions. If one item is labeled “Chicken Sandwich” and another is labeled “Chx Sand,” employees and reports may become harder to interpret. Use names that are clear to staff while remaining concise enough for kitchen tickets and receipts.
Review:
- Menu categories and subcategories
- Item names and descriptions
- Sizes and portions
- Prices
- Modifier groups
- Required and optional modifiers
- Default choices
- Combo and meal rules
- Discounts and promotions
- Tax categories
- Availability schedules
- Kitchen routing
- Online ordering visibility
- Inventory mappings
A structured menu also supports better reporting. Consistent categories make it easier to compare food, beverage, retail, and promotional sales.
Review Menu Items and Modifiers
Modifiers tell the kitchen how an item should be prepared. Missing, duplicated, or poorly organized modifiers can increase order-entry time and create production errors.
Review popular items first. Confirm that required choices appear at the correct time and that employees cannot accidentally skip important selections. For example, a steak order may require temperature, side, and sauce selections.
Avoid displaying every possible modifier for every item. Employees should see only relevant choices. A long, disorganized modifier list slows order entry and increases the chance of selecting the wrong option.
Test how modifiers appear in three places:
- On the employee’s order-entry screen
- On the kitchen ticket or kitchen display
- On the customer receipt or digital order confirmation
The wording may need adjustment so it is understandable in all three environments.
Confirm Tax, Tip, and Discount Settings
Tax settings, tip prompts, service charges, discounts, and comp reasons should be reviewed before launch. These settings can affect checkout, reporting, employee procedures, and reconciliation.
Confirm that items are assigned to the appropriate categories based on the restaurant’s reviewed requirements. Test dine-in, takeout, delivery, retail merchandise, and any other transaction types used by the business.
Tip settings should reflect the restaurant’s service model and payment workflow. Test suggested tips, custom tips, no-tip options, printed receipts, digital receipts, and any process for adjusting tips after authorization.
Discounts and comps should have clear names and permission requirements. Managers should understand which actions require approval and how those transactions appear in reports.
Specific tax, tip, payroll, employment, accounting, or service-charge questions should be reviewed with qualified professionals familiar with the restaurant’s circumstances.
Step Four: Plan POS Data Migration
POS data migration is the process of moving selected information from the old system into the new one. Some data may be imported automatically, while other information may need to be rebuilt, reformatted, or stored separately.
Begin by asking what data can be exported from the current system and in which file formats. Also determine how long historical records will remain available after cancellation. Do not assume that all reports or customer records will remain accessible indefinitely.
The restaurant should decide which information needs to be:
- Imported into the new system
- Recreated manually
- Archived securely
- Retained in the old system temporarily
- Removed because it is outdated or unnecessary
POS data migration should be handled carefully because older systems often contain duplicate customers, inactive employees, outdated menu items, and inconsistent categories.
Keep an untouched copy of original exports. Working files can then be cleaned or reformatted without changing the archived source data.
Data Restaurants May Need to Transfer
The data required depends on the restaurant’s operations and the capabilities of both systems. Common migration categories include:
- Menu items and modifiers
- Prices and categories
- Customer records
- Loyalty balances
- Gift card information
- Employee profiles
- User roles
- Inventory items
- Ingredient mappings
- Vendor information
- Open tabs or house accounts
- Sales history
- Tip and payment reports
- Discount and void records
- Online ordering menus
Not every category can or should be imported. Historical sales data may be available only as archived reports, while gift card or loyalty balances may require a specialized transfer process.
Customer data should be limited to information the restaurant has a valid operational reason to retain. Access should be controlled, and the restaurant should avoid moving unnecessary sensitive information into the new environment.
Data That May Need Manual Review
Automatic import does not guarantee accurate configuration. A file can transfer successfully while still producing duplicate records, broken formatting, incorrect category assignments, or missing relationships.
Manually review:
- Duplicate menu items
- Item names with unusual characters
- Missing prices
- Inactive employees
- Old customer records
- Duplicate customer profiles
- Unused discounts
- Expired promotions
- Incorrect tax mappings
- Modifier groups attached to the wrong items
- Ingredients mapped to the wrong recipes
- Gift card or loyalty balance exceptions
Use sample-based checks for large datasets. Review high-volume menu items, top customers where appropriate, common discounts, and recent transactions. Then compare record counts and totals between the source file and imported data.
Step Five: Review Hardware and Network Requirements
POS hardware setup may include fixed terminals, tablets, handheld devices, cash drawers, receipt printers, kitchen printers, kitchen display systems, barcode scanners, payment terminals, routers, switches, access points, charging docks, and backup power equipment.
Create a hardware map showing where every device will be installed. Include device names, network connections, printer assignments, payment-terminal pairings, and power requirements.
Physical placement matters. Terminals should not block service paths, cables should be protected, and kitchen equipment should be positioned away from excessive heat, grease, or moisture where possible.
Confirm whether existing devices are compatible with the new software. A printer or card reader that works with the old system may not be supported by the new one.
Restaurants evaluating a cloud-based POS system should pay particular attention to network design, device connectivity, offline behavior, and account-access controls.
Test Devices Before Service
Turn on and test every device before the launch shift. Do not limit testing to one terminal and assume that identical devices will behave the same way.
For each station, confirm:
- The employee can sign in
- The correct menu appears
- Orders can be entered
- Payments can be started
- Receipts print correctly
- Cash drawers open when expected
- Kitchen tickets reach the correct station
- Displays show readable information
- Scanners recognize configured products
- Device batteries charge properly
- Cables remain secure during normal movement
Label devices and cables where useful. During a problem, a manager should be able to identify “Bar Terminal Two” or “Grill Printer” quickly rather than describing an unidentified device.
Check Wi-Fi, Internet, and Offline Mode
A stable network supports order synchronization, cloud access, online ordering, reporting, and payment communication. Consumer-grade Wi-Fi that appears adequate for guest browsing may not be sufficient for a busy restaurant operation.
Test connectivity from every area where handheld devices will be used. Look for weak coverage near patios, bars, kitchens, drive-through areas, and outdoor service spaces.
Understand what offline mode does and does not support. Some systems allow order entry while disconnected but may limit payment authorization, online order receipt, gift card lookup, loyalty functions, or data synchronization.
Document the steps employees should follow when connectivity fails. A backup internet connection may reduce risk, but it should be tested rather than assumed to work.
Step Six: Set Up Payment Processing Carefully
POS payment setup should be completed early enough to allow full transaction testing. Payment configuration may include card acceptance, contactless payments, digital wallets, tip collection, refunds, voids, preauthorizations, partial payments, split payments, and batch settlement.
Restaurant owners can also review this guide to secure payment processing in restaurant POS systems when preparing payment devices, employee access, transaction procedures, and launch-day testing.
Verify that each payment terminal is paired with the correct POS station. Confirm that transaction amounts appear correctly on both the employee screen and customer-facing device.
Managers should understand the difference between canceling an order, voiding a payment, issuing a refund, and adjusting a tip. These actions may follow different procedures and appear differently in reports.
End-of-day settlement must also be tested. A successful card authorization is not the final step. The restaurant needs to confirm that payments, tips, refunds, and batch totals appear as expected during reconciliation.
Test Payments Before Launch
Run controlled test transactions using the payment types the restaurant expects to accept. Follow each transaction through authorization, receipt creation, reporting, refund, and settlement where possible.
Test scenarios should include:
- Inserted card payments
- Contactless card payments
- Digital wallets
- Tips
- No-tip transactions
- Split checks
- Split tender
- Partial payments
- Refunds
- Voids
- Declined transactions
- Receipt reprints
- Bar-tab or preauthorization workflows
- End-of-day batch review
Record test amounts and results so they can be identified later. After settlement, compare POS totals with the payment reporting environment and note any timing or category differences.
Review Payment Security Practices
Payment security should be included in the migration plan rather than treated as a separate technical task. Staff should use approved payment devices and should not write down, message, photograph, or store raw card details.
Limit access to payment settings, refunds, reports, and administrative functions. Employees should use individual credentials rather than shared manager accounts whenever the system supports them.
The merchant payment-security resources explain that protecting payment data depends on people, processes, and properly implemented technology. They also provide guidance on strong passwords, secure remote access, patching, and approved payment solutions.
Restaurants should confirm their specific payment-security and validation responsibilities with appropriate payment and security professionals.
Step Seven: Set Up User Roles and Permissions
Employee permissions determine what each user can see and change. Poorly configured access can create operational confusion and increase the risk of unauthorized discounts, refunds, menu edits, or report access.
Create roles based on job duties rather than configuring every employee independently. Common roles may include cashier, server, bartender, host, kitchen employee, shift leader, manager, administrator, and accounting viewer.
Review permissions for:
- Order entry
- Open checks
- Closed checks
- Discounts
- Comps
- Voids
- Refunds
- Cash drawer access
- Tip adjustments
- Menu edits
- Price changes
- Employee records
- Time-clock edits
- Sales reports
- Payment reports
- System configuration
Test each role by signing in as a representative user. An administrator’s successful test does not prove that a cashier or server has the right access.
Match Permissions to Job Roles
Employees should receive the access required to perform their responsibilities without receiving unnecessary administrative control.
A cashier may need to apply approved promotions but not create new discounts. A server may need to split checks but not issue a refund on a closed transaction. A shift manager may need access to voids and daily reports but not payment-account configuration.
Role-based access makes training clearer. Employees learn which actions they can complete and when manager approval is required.
Document exception procedures. For example, staff should know what to do when a customer requests a refund but the only manager with refund authority is temporarily unavailable.
Review Access After Launch
Permissions should be reviewed after the first days and again after the operation stabilizes. Staff feedback may reveal that a role lacks a required function or includes access that is not necessary.
Remove test accounts, duplicate users, inactive employees, and temporary implementation access. Confirm that former employees cannot sign in and that shared credentials have not become the normal workflow.
Review manager and administrator activity where reporting is available. The purpose is not to create unnecessary monitoring but to confirm that sensitive actions follow the restaurant’s approved process.
Step Eight: Configure Front-of-House Workflows
Front-of-house configuration affects how quickly and accurately employees can serve guests. The setup should reflect the restaurant’s service model rather than forcing staff to adapt to a generic screen arrangement.
Review table management, seat numbers, course timing, bar tabs, takeout orders, customer lookup, reservations, discounts, receipts, and payment flow.
Frequently used items should be easy to locate. Categories should follow the way employees think during service. A breakfast café may organize screens by beverages, breakfast plates, sides, and bakery items, while a bar may prioritize beer, wine, spirits, cocktails, and tabs.
Keep front-of-house workflow consistent across similar terminals. Unnecessary differences between stations can confuse employees who move between sections.
Test Common Service Scenarios
Create realistic practice scenarios instead of testing only simple one-item transactions.
Test:
- A dine-in order with several courses
- A takeout order with a promised time
- A bar tab with multiple rounds
- An order split by seat
- A check divided among several guests
- A partial cash and card payment
- An item comp
- A manager-approved discount
- A void before preparation
- A refund after payment
- A receipt reprint
- A customer lookup
- A table transfer between servers
Observe how many steps each task requires and where employees hesitate. The goal is to make frequent actions fast while keeping sensitive actions controlled.
Make the Screen Layout Easy for Staff
Screen design can affect service speed more than the number of available features. Use clear categories, consistent naming, and logical button placement.
Place high-volume items in convenient locations. Avoid overcrowding screens with discontinued items, rarely used buttons, or administrative functions. Use modifier groups that appear only when relevant.
Do not make staff memorize unclear abbreviations. Item names should be recognizable while still fitting on screens and kitchen tickets.
After pilot training, ask employees which buttons are difficult to find. Small layout adjustments made before launch can prevent repeated delays during service.
Step Nine: Configure Back-of-House and Kitchen Workflows
Back-of-house configuration determines how orders move from the POS to prep stations. A correctly entered order is still a service failure if the kitchen never receives it or receives incomplete instructions.
Map each item to the appropriate printer or kitchen display station. Common destinations may include grill, fry, salad, pizza, bar, dessert, expo, beverage, or packaging.
Review:
- Item routing
- Modifier routing
- Course timing
- Hold and fire functions
- Rush indicators
- Takeout labels
- Delivery order labels
- Special instructions
- Ticket grouping
- Kitchen display colors or alerts
- Expo workflow
- Ticket completion and recall
Kitchen employees should participate in testing because they can identify unclear names, poor modifier order, and routing problems that front-of-house managers may miss.
Test Kitchen Ticket Routing
Send sample orders containing items from every menu category. Confirm that each item reaches the correct preparation station and that expo receives the information needed to assemble the order.
Test complex orders with modifiers. A simple burger may route correctly while a burger with allergy notes, substitutions, and side changes may produce an unclear ticket.
Also test voids, added items, re-fired items, held courses, and online orders. The kitchen should be able to distinguish new items from cancellations or modifications.
Check ticket readability under actual kitchen conditions. Font size, line spacing, modifier sequence, and ticket length all affect usability.
Reduce Confusion During Peak Service
Kitchen tickets should present information in a predictable order. Item names, quantities, seat numbers, modifiers, special instructions, and timing indicators should be easy to scan.
Avoid unnecessary words or duplicate modifiers. At the same time, do not shorten descriptions so much that employees must guess what they mean.
Confirm how identical items are grouped. Some kitchens prefer combined quantities, while others need each item separated by seat or course.
Run a timed practice session with several simultaneous orders. This helps reveal whether tickets arrive in the right order and whether station employees can identify priorities during a rush.
Step Ten: Review Integrations Before Go-Live
A modern restaurant POS system may connect with inventory, scheduling, accounting, payroll, online ordering, delivery services, reservations, loyalty programs, gift cards, customer tools, and reporting dashboards.
Because digital orders can affect menu availability, payments, kitchen routing, receipts, and reporting, restaurants should carefully test their restaurant POS integration with online ordering before the new system goes live.
Create an integration inventory that records:
- The connected system
- The information it sends
- The information it receives
- The synchronization schedule
- The person responsible
- The test method
- The backup process if synchronization fails
Restaurants planning broader operational connections can review how POS integration with inventory and scheduling may affect item mapping, labor information, and management reporting.
Prioritize Critical Integrations First
Do not activate every integration at the same time unless the operation has the resources to test and support them.
Start with connections that directly affect service or essential management processes. These often include:
- Payment processing
- Kitchen routing
- Online ordering
- Delivery order intake
- Core sales reporting
- Required accounting exports
- Gift card acceptance
Advanced inventory, loyalty marketing, scheduling, and customer automation can be phased in after ordering, payments, and kitchen production are stable.
This approach reduces troubleshooting complexity. When too many integrations launch simultaneously, it becomes difficult to determine which connection caused an incorrect total or missing order.
Test Data Flow Between Systems
Testing should follow data from its starting point to its destination. For example, place an online order as a customer, confirm that it appears in the POS, verify that it routes to the kitchen, and check how it appears in reports.
For inventory integration, sell test items and confirm that the expected ingredients or stock quantities are deducted. For scheduling or labor tools, verify that employee identifiers and worked hours match correctly.
Compare sales, taxes, tips, refunds, discounts, fees, and payment categories across connected reports. Differences may reflect timing or reporting definitions rather than errors, but managers need to understand those differences before launch.
Accounting, payroll, tax, and employment-related integrations should be reviewed by qualified professionals responsible for those areas.
Step Eleven: Train Staff by Role
POS training for staff should reflect what each employee does during a normal shift. A single general demonstration is rarely enough.
Training should combine explanation with hands-on practice. Employees learn more effectively when they enter orders, correct mistakes, process payments, and respond to realistic situations.
Create separate training paths for:
- Servers
- Cashiers
- Bartenders
- Hosts
- Kitchen employees
- Shift leaders
- Managers
- Bookkeepers
- Owners and administrators
Provide short reference guides for frequent tasks. These may include opening a shift, entering an order, transferring a table, splitting a check, processing a refund, closing a drawer, or responding to an offline alert.
Front-of-House Training
Front-of-house employees should practice the complete customer interaction, not just menu navigation.
Training scenarios should include order entry, required modifiers, substitutions, special instructions, table transfers, seat numbers, split checks, discounts, gift cards, tips, refunds, and receipt options.
Ask employees to correct deliberate mistakes. For example, have a server remove an item already sent to the kitchen or transfer a table after an order has been entered.
Staff should also know how to explain brief delays to customers without blaming technology or sharing unnecessary internal details. A calm, prepared response protects customer confidence during the transition.
Manager Training
Managers need deeper training because they will handle exceptions and support employees during service.
They should practice:
- Approving discounts and comps
- Voiding items and payments
- Issuing refunds
- Adjusting tips where permitted
- Reviewing open checks
- Closing shifts
- Reviewing drawers
- Checking payment batches
- Reprinting reports
- Editing menu availability
- Resetting employee access
- Reviewing online order status
- Responding to printer or network problems
- Escalating unresolved issues
At least one trained manager should be present during each early launch shift. Depending on the restaurant, a second person may be assigned specifically to support POS questions so the shift manager can continue running service.
Step Twelve: Run a Pilot or Parallel Test
Pilot testing uses the new system in a limited, controlled environment before full launch. Parallel testing compares the old and new systems or their outputs during a defined period.
A pilot may involve a training meal, employee event, limited service period, test terminal, or low-volume shift. The objective is to expose the system to realistic orders without placing the entire operation at risk.
Parallel testing does not always mean entering every live order into both systems. That approach can create confusion. Instead, the restaurant may compare menu data, sample transactions, payment reports, inventory deductions, or end-of-day totals.
The pilot should produce a documented list of issues, owners, corrections, and retest results.
What to Test During a Pilot
A practical pilot should test:
- Menu items and prices
- Required modifiers
- Optional modifiers
- Tax settings
- Discounts
- Comps
- Tips
- Receipts
- Cash drawers
- Printers
- Kitchen displays
- Payment types
- Refunds
- Voids
- Split checks
- Online orders
- Delivery orders
- Gift cards
- Loyalty functions
- Inventory deductions
- Employee time entry
- User permissions
- Shift reports
- Batch settlement
- Offline procedures
Include high-volume and complex items. Testing only the easiest orders creates false confidence.
Why Parallel Testing Reduces Risk
Parallel testing helps managers identify differences before they become customer-facing problems. An item may have the correct price in both systems but a different tax category. A sales report may total correctly while organizing tips or discounts under different headings.
Comparisons also help the management team learn how the new reporting dashboards work. A difference is not automatically an error, but it must be understood.
Maintain a comparison worksheet showing the old-system value, new-system value, expected result, explanation, and resolution status.
Step Thirteen: Prepare a Service Disruption Backup Plan
Even a well-tested system can experience an unexpected device, network, power, or integration problem. A backup plan helps the restaurant maintain operational continuity while the issue is investigated.
The plan should answer four questions:
- How will employees take orders?
- How will orders reach the kitchen?
- How will payments be handled?
- How will transactions be entered and reconciled later?
Prepare manual order pads, printed menus, current prices, support contacts, device labels, network details, and escalation instructions. Managers should know which functions remain available in offline mode.
The restaurant should also define who makes the decision to switch to backup procedures and who decides when normal processing can resume.
What to Do If the POS Goes Down
When the POS becomes unavailable, the manager should first identify whether the problem affects one device, one station, one location, or the entire system.
Employees can move to functioning terminals when practical. If order entry is unavailable, use numbered manual order pads and write clear item, modifier, table, server, and time information.
Create a consistent process for delivering manual tickets to the kitchen. Do not allow each server to invent a different method.
Payment procedures depend on the available equipment and approved operational process. Staff should not record raw card information as a workaround. Managers should follow reviewed payment procedures and seek appropriate support when required.
After service, enter or reconcile transactions carefully to avoid duplicate charges, missing sales, or incorrect inventory adjustments.
Keep Backup Supplies Ready
Backup supplies should be stored in a known, accessible location. A downtime kit may include:
- Numbered order pads
- Pens and markers
- Printed menus and current prices
- Receipt paper
- Printer paper
- Charger cables
- Power adapters
- Device labels
- Network contact details
- Support numbers
- Manager escalation steps
- Flashlights or battery lights where appropriate
- Backup connectivity instructions
Check the kit regularly. A backup cable that no longer fits the current hardware is not useful.
Step Fourteen: Choose the Right Go-Live Strategy
Restaurants can choose from several rollout approaches. The right choice depends on operational complexity, number of locations, staff readiness, and support availability.
A full launch replaces the old system at one time. It can be efficient for a small, well-tested operation but creates greater risk if important issues remain unresolved.
A soft launch uses the new system during a quieter service period. A shift-by-shift rollout introduces it to selected shifts, while a phased feature rollout activates core ordering and payments first.
Multi-location groups may switch one location at a time. The first site becomes a controlled pilot, allowing the organization to improve training and configuration before expanding.
Soft Launch for Lower Risk
A soft launch gives employees an opportunity to build confidence with real transactions while customer volume is manageable.
Choose a period with experienced staff, available managers, and immediate support. Reduce unnecessary menu promotions or operational changes during the shift.
Track questions and issues in real time. Some problems will require configuration changes, while others may be resolved through clearer training.
After the soft launch, hold a structured review. Decide whether the system is ready for normal volume or whether another limited test is needed.
Multi-Location Rollout Planning
Switching every location simultaneously may appear faster, but it can create widespread disruption if a shared menu, integration, or payment configuration is wrong.
A staged restaurant POS migration allows the project team to learn from the first location. Improvements can then be added to training materials, hardware plans, and the POS rollout checklist.
Choose a pilot location that represents normal operating complexity. An unusually quiet or simple location may not expose problems that will appear elsewhere.
Keep core configuration consistent while documenting approved location differences in pricing, menus, taxes, hardware, and operating procedures.
Step Fifteen: Monitor Service After Launch
The POS migration process continues after the system goes live. Early monitoring helps the restaurant correct small problems before employees create permanent workarounds.
Managers should watch for:
- Slow order entry
- Missing buttons
- Incorrect prices
- Modifier confusion
- Kitchen ticket delays
- Printer failures
- Payment declines
- Refund difficulties
- Incorrect tip totals
- Online order gaps
- Inventory mismatches
- User-permission problems
- Report differences
- Customer complaints
Create one issue log rather than collecting problems through scattered messages and verbal comments. Record the time, location, device, user, transaction type, description, impact, and resolution.
First-Week Review Checklist
During the first week, managers should review core operations every day.
Check:
- Gross and net sales
- Payment totals
- Cash totals
- Tips
- Refunds
- Voids and comps
- Open checks
- Batch settlement
- Online ordering
- Delivery integrations
- Printer and display issues
- Inventory exceptions
- Employee access
- Staff questions
- Customer feedback
Compare reports with expected operating patterns and available source records. Unexpected differences should be investigated promptly.
Keep daily review meetings brief and focused. Identify the highest-impact problems, assign owners, and confirm when corrections will be retested.
Collect Staff Feedback Quickly
Employees often notice workflow problems before they appear in management reports. Gather feedback after each early shift.
Ask specific questions:
- Which task took longer than expected?
- Which item or modifier was difficult to find?
- Which ticket was unclear?
- Which permission was missing?
- Which customer question was difficult to answer?
- Which workaround did employees use?
Avoid changing the entire layout after every comment. Look for recurring problems and prioritize changes that affect service speed, order accuracy, or payment flow.
Common Mistakes to Avoid When Switching POS Systems

Many migration problems result from avoidable project decisions rather than defective software.
Common mistakes include:
- Rushing the migration timeline
- Importing data without cleanup
- Skipping role-based training
- Launching during peak service
- Testing only simple orders
- Failing to test payment settlement
- Ignoring kitchen routing
- Assuming integrations work because they are connected
- Giving employees excessive permissions
- Failing to archive old reports
- Activating too many advanced features
- Starting without a downtime plan
The best practices for switching POS systems focus on reducing uncertainty. Every critical workflow should have an owner, a test method, an expected result, and a fallback procedure.
Waiting Until Go-Live to Test Payments
Payment problems immediately affect customers and cash flow. A terminal that powers on may still be paired with the wrong station, configured incorrectly, or unable to complete settlement.
Restaurants should test the complete payment life cycle before launch. That includes authorization, tipping, receipts, refunds, reports, and batch review.
Test each terminal, not only one representative device. Also confirm how declined transactions, canceled payments, and interrupted connections appear to staff.
Payment testing should occur early enough to allow correction and retesting. Discovering a batch or refund problem during the first live shift places unnecessary pressure on managers.
Migrating Bad Data Into the New System
Old POS systems often contain years of temporary buttons, duplicate items, inactive employees, outdated prices, and inconsistent categories.
Moving this information without review creates immediate clutter. It can also weaken reporting because similar products may remain split across several item names or categories.
Data cleanup is one of the most valuable parts of switching POS systems. It gives the restaurant an opportunity to simplify menu screens, standardize reports, remove inactive users, and document current operating rules.
Do not assume that bad data can be cleaned later. Once employees begin using the new system, duplicate records and inconsistent naming can become harder to correct.
POS System Migration Checklist for Business Owners
The following POS system migration checklist for business owners can be used as a final readiness review.
| Checklist Area | What to Confirm | Why It Matters |
| Migration plan | Timeline, owners, deadlines, escalation | Keeps the rollout organized |
| Menu data | Items, prices, categories, modifiers | Prevents order and pricing errors |
| Hardware | Terminals, printers, displays, card readers | Keeps service stations operating |
| Network | Wi-Fi, internet, backup connection, offline mode | Reduces service downtime risk |
| Payments | Cards, tips, refunds, voids, settlement | Protects checkout and reconciliation |
| Kitchen routing | Printers, displays, prep stations, expo | Prevents missed or delayed tickets |
| User roles | Staff access, approvals, administrators | Protects sensitive functions |
| Integrations | Online orders, inventory, scheduling, reporting | Keeps operational data connected |
| Training | Front-of-house, kitchen, manager practice | Reduces confusion during launch |
| Backup plan | Manual steps, supplies, contacts, escalation | Protects service continuity |
How to Use the Checklist Before Go-Live
Review the checklist in a formal readiness meeting. Each category should have one of three statuses:
- Ready
- Ready with a documented limitation
- Not ready
Avoid vague labels such as “probably fine.” A category should be considered ready only when the required tests have been completed successfully.
For any limitation, document the operational impact and workaround. Management can then decide whether the remaining risk is acceptable or whether the launch should be postponed.
The checklist should be signed or approved by the people responsible for operations, payments, menu configuration, hardware, kitchen workflow, and training.
Records to Keep During Migration
Maintain organized records throughout the POS migration process.
Useful records include:
- Original data exports
- Cleaned import files
- Old POS sales reports
- Menu spreadsheets
- Configuration decisions
- Hardware inventory
- Device assignments
- Payment test records
- Training attendance
- User-role definitions
- Integration test results
- Support tickets
- Launch-day issue logs
- Daily post-launch reviews
Access should be restricted based on the sensitivity of the information. Retention decisions involving financial, employment, tax, payment, or customer records should receive appropriate professional review.
Best Practices for Switching POS Systems Without Disrupting Service
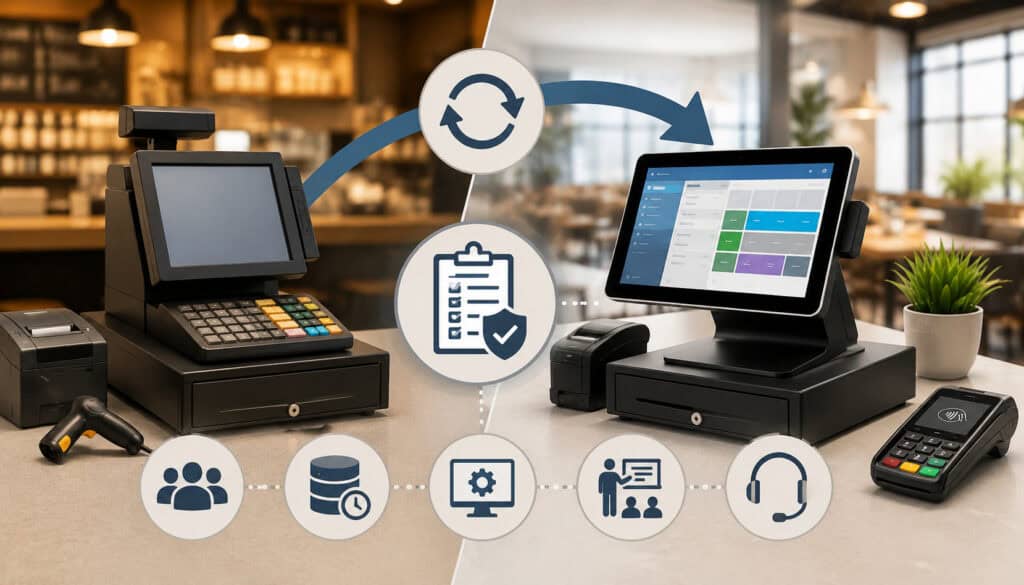
The following practices help restaurants protect service continuity during a POS system upgrade:
- Start with a written migration plan.
- Identify the problems the new system must solve.
- Clean menu and customer data before transfer.
- Archive old reports before canceling access.
- Configure employee roles before training.
- Test every payment terminal.
- Verify refunds, tips, and settlement.
- Confirm kitchen routing with sample tickets.
- Test online ordering as a customer.
- Train staff by job role.
- Choose a low-volume go-live window.
- Keep manual order tools available.
- Understand offline mode.
- Compare old and new reports.
- Track first-week issues centrally.
- Gather staff feedback after each early shift.
- Roll out advanced features gradually.
- Keep the customer experience at the center.
A detailed guide to switching POS systems without disrupting service should be adapted to the restaurant’s service style, menu complexity, payment workflow, staffing structure, and number of locations.
Create a POS Migration Command Center
A migration command center is a simple coordination process for launch day. It can be a shared document, issue tracker, manager station, or designated communication channel.
It should contain:
- Migration lead contact information
- Hardware and device list
- Support contacts
- Staff schedules
- Known limitations
- Issue log
- Priority definitions
- Escalation steps
- Backup procedures
- Status updates
Assign one person to record issues so managers do not report the same problem repeatedly. Classify issues by impact: service stopped, service slowed, reporting issue, training question, or future improvement.
Keep communication concise. During a busy shift, employees need clear instructions rather than lengthy technical explanations.
Phase Advanced Features After the Basics Work
Core ordering, payments, kitchen routing, and reporting should be stable before the restaurant adds complex features.
Advanced inventory, loyalty automation, customer campaigns, detailed scheduling, and deep reporting can provide value, but they also add configuration and training requirements.
A phased rollout lets employees master the essential workflows first. It also gives managers cleaner troubleshooting because fewer variables are changing at the same time.
Create a second-phase roadmap with clear goals. Do not leave advanced functions unplanned indefinitely, but avoid allowing them to put launch stability at risk.
How to Choose a New POS System Before Switching
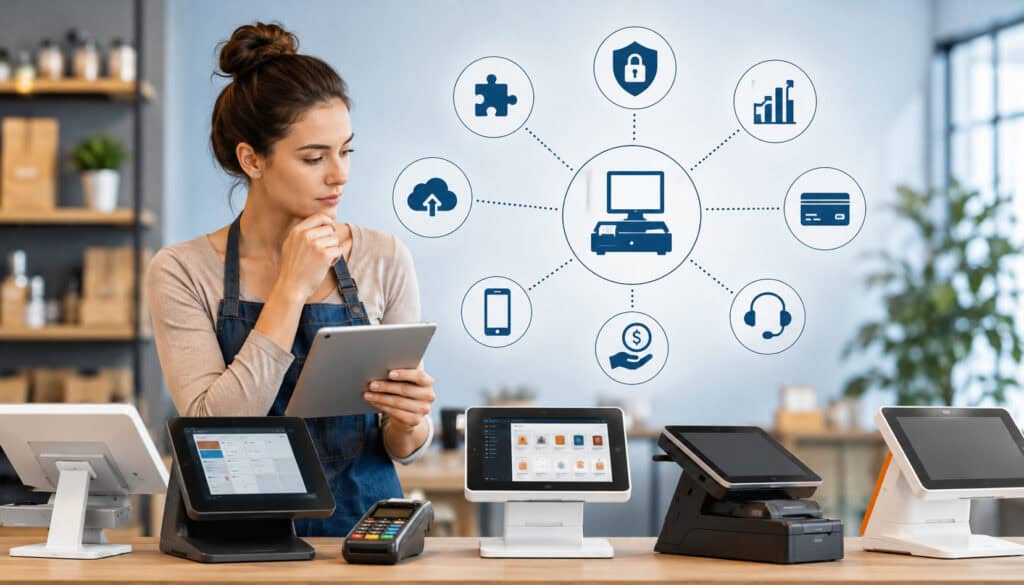
A smooth migration begins with selecting a system that fits the restaurant’s real workflows. A platform may offer many features but still be difficult for employees to use during a rush.
Evaluate how the system handles:
- Menu creation and modifiers
- Table or tab management
- Payment processing
- Tips and refunds
- Kitchen routing
- Online ordering
- Delivery integrations
- Inventory tools
- Scheduling connections
- User permissions
- Multi-location management
- Reporting dashboards
- Offline operation
- Hardware options
- Data migration assistance
- Training resources
- Support availability
- Total operating cost
Restaurants researching a new restaurant POS system should request demonstrations built around their own menu and service scenarios rather than relying only on a standard sales presentation.
Review contract, pricing, payment, support, data-access, and cancellation questions carefully. Obtain professional guidance when the terms involve legal, accounting, financial, payroll, employment, or compliance considerations.
Questions to Ask Before Choosing a POS System
Ask practical questions before making a decision:
- Which menu and customer data can be imported?
- Which data cannot be transferred?
- How can historical reports be retained?
- Which payment terminals are supported?
- How are tips, refunds, and batches handled?
- What happens when the internet fails?
- Which functions remain available offline?
- How are kitchen printers and displays configured?
- Can menus differ by location?
- How are user roles controlled?
- Which online ordering tools are supported?
- How are gift cards and loyalty balances migrated?
- What training is included?
- When is support available?
- How are urgent service issues escalated?
- Which integrations require additional fees?
- How can data be exported?
- What happens to data after cancellation?
- Which hardware must be purchased or replaced?
- What are the contract and renewal terms?
Answers should be documented. Verbal assumptions can create confusion later.
Comparing Workflow Fit Over Feature Lists
Feature count is not the same as operational fit. A system with hundreds of capabilities may still slow down servers or produce unclear kitchen tickets.
Evaluate the system through realistic workflows. Ask a server to enter a complex order, a bartender to manage tabs, a cashier to process a split payment, and a manager to issue a refund and review the shift.
Observe speed, clarity, and error risk. Review how information appears to customers, kitchen employees, managers, and bookkeepers.
The strongest system is usually the one that performs the restaurant’s most important tasks reliably, supports clear reporting, and can be learned by the people who will use it every day.
The small-business cybersecurity guidance also provides general resources for protecting business systems and information. Restaurants should include security, access control, software updates, and vendor practices in their system evaluation.
Frequently Asked Questions
How can a restaurant switch POS systems without disrupting service?
Start with a written POS transition plan that covers menu data, hardware, payments, kitchen routing, employee access, integrations, training, testing, and backup procedures.
Clean the data before importing it, test realistic transactions, and schedule the go-live date during a lower-volume period. Managers should also keep manual order-taking supplies and escalation contacts ready. The restaurant should monitor sales, payments, kitchen tickets, online orders, and employee feedback closely after launch.
What is a POS system migration?
A POS system migration is the process of moving from one point of sale environment to another. It may include software, terminals, payment devices, printers, menu information, customer records, employee access, integrations, and reports.
The migration also involves adapting front-of-house, back-of-house, payment, and management workflows to the new system. It is therefore both a technology project and an operational change.
What should be included in a POS migration process?
A complete process should include current-system assessment, requirement review, timeline planning, data cleanup, data transfer, hardware installation, network testing, payment configuration, user-role setup, integration testing, staff training, pilot testing, go-live support, and post-launch monitoring.
It should also include a clear backup plan for device, network, payment, or software interruptions. Each important task should have an owner, deadline, test method, and expected result.
How long should restaurants prepare before switching POS systems?
The preparation period depends on menu size, service complexity, number of devices, integrations, data volume, training requirements, and number of locations.
A small counter-service operation may require less preparation than a full-service or multi-location group. The schedule should allow enough time for configuration, testing, staff practice, corrections, and retesting.
Restaurants should avoid choosing a launch date based only on installation availability. Operational readiness should determine whether the system goes live.
What data should be reviewed before POS migration?
Restaurants should review menu items, prices, categories, modifiers, tax settings, discounts, employee profiles, customer records, gift card balances, loyalty information, inventory items, recipes, sales history, and reporting files.
Remove duplicates, inactive users, old products, expired promotions, and outdated customer records where appropriate. Keep an original archive before cleaning or reformatting files. Professional review may be appropriate for record-retention, payment, employment, tax, accounting, or customer-data questions.
How can staff training reduce POS service disruption?
Training helps employees complete frequent tasks without stopping to ask for instructions during service. It also shows managers where the screen layout, permissions, or procedures need improvement.
Employees should practice by role. Servers need order and payment scenarios, kitchen employees need ticket-routing practice, and managers need refunds, voids, reporting, settlement, permissions, and troubleshooting. Hands-on practice is more effective than relying only on demonstrations or written instructions.
What should restaurants test before a new POS goes live?
Restaurants should test menu items, modifiers, prices, taxes, discounts, tips, receipts, printers, cash drawers, kitchen displays, payment terminals, refunds, voids, split checks, online orders, delivery orders, user permissions, inventory deductions, reports, and batch settlement.
Testing should include realistic complex orders and failure scenarios, not only simple transactions. Every corrected issue should be retested before it is marked complete.
Conclusion
Switching POS systems without disrupting service is possible when the restaurant prepares for the change as an operational transition rather than a simple software installation.
The strongest migrations begin with a clear understanding of current problems and a written plan covering data cleanup, menu migration, POS hardware setup, payment verification, user permissions, kitchen routing, integrations, staff training, pilot testing, and backup procedures.
Before the go-live date, every critical workflow should be tested from beginning to end. Employees should know how to enter orders, communicate with the kitchen, process payments, handle exceptions, and respond when a device or connection becomes unavailable.
Launch timing also matters. A quieter service window, trained managers, accessible support contacts, and ready backup supplies reduce the risk that a small technical issue will become a major customer-service problem.
After launch, the restaurant should monitor order accuracy, ticket times, payment results, online ordering, reports, employee questions, and customer feedback. Early adjustments to menu layouts, permissions, routing, and training can prevent temporary problems from becoming permanent workarounds.
A successful POS system migration does not depend on eliminating every possible issue. It depends on identifying critical risks, testing carefully, preparing staff, and responding quickly.
When the new system supports real front-of-house, back-of-house, payment, reporting, and management needs, the transition can improve operations without sacrificing the customer experience.